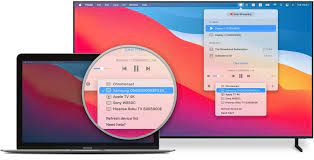
Are you tired of squinting at your small MacBook screen? Want to enjoy your favorite movies and videos on a larger display? Look no further! In this article, we’ll show you how to easily mirror your MacBook to your TV.
All you need is the right hardware and software, and we’ll guide you through the simple steps to connect your devices. Say goodbye to straining your eyes and hello to a more immersive viewing experience!
Required Hardware and Software
To mirror your MacBook to a TV, you’ll need the necessary hardware and software.
First, you’ll need an HDMI cable to connect your MacBook to the TV. Make sure your MacBook has an HDMI port, or you may need an adapter.
Next, you’ll need a TV that supports HDMI input. Most modern TVs have this feature, but it’s always good to double-check.
Once you have the hardware, you’ll need software to enable screen mirroring. If you have a newer MacBook with macOS Catalina or later, you can use the built-in AirPlay feature to mirror your screen wirelessly. Alternatively, you can use third-party software like Reflector or AirServer.
With the right hardware and software, you’ll be able to enjoy your MacBook content on the big screen.
Connecting Your Macbook to the TV
You can easily connect your MacBook to your television using an HDMI cable.
First, locate the HDMI port on both your MacBook and your TV. It is usually labeled ‘HDMI’ and has a specific shape.
Next, connect one end of the HDMI cable to the HDMI port on your MacBook and the other end to the HDMI port on your TV. Make sure the cable is securely connected.
Once the cable is connected, switch on your TV and select the correct HDMI input using your TV remote. Your MacBook’s screen should now be mirrored on your TV.
If the screen doesn’t appear, you may need to adjust your MacBook’s display settings. Go to System Preferences, click on Displays, and choose the appropriate settings.
Enjoy watching your favorite content on the big screen!
Adjusting Display Settings on Your Macbook
Adjusting the display settings on your MacBook is a simple process that allows you to personalize your viewing experience. You can easily customize the brightness, resolution, and color settings to suit your preferences.
To adjust the display settings, start by clicking on the Apple menu in the top-left corner of your screen and selecting ‘System Preferences.’ Then, choose ‘Displays’ from the options available.
Here, you can adjust the brightness slider to make the screen brighter or dimmer. You can also select the ‘Display’ tab to change the resolution and arrange the displays if you have multiple monitors connected. Additionally, you can calibrate the color settings by clicking on the ‘Color’ tab and following the on-screen instructions.
With these simple adjustments, you can enhance your viewing experience on your MacBook.
Troubleshooting Common Issues
Having trouble with your MacBook display? Don’t worry, troubleshooting common issues is easier than you think.
First, check the connections between your MacBook and the display. Ensure that the cables are securely plugged in and that there are no loose connections.
Next, try adjusting the display settings on your MacBook. Go to System Preferences, click on Displays, and make sure the resolution and refresh rate are set correctly.
If the issue persists, try resetting the System Management Controller (SMC) on your MacBook. Simply shut down your MacBook, press and hold the power button for 10 seconds, then release it and turn your MacBook back on.
If none of these solutions work, it may be time to contact Apple Support for further assistance.
Additional Tips and Tricks for a Seamless Experience
To enhance your experience with your MacBook and external display, consider adjusting the color calibration settings for optimal visuals. By customizing the color settings, you can ensure that the colors on your screen appear true and vibrant.
To do this, go to the Apple menu, select System Preferences, and choose Displays. From there, navigate to the Color tab and click on Calibrate. Follow the on-screen instructions to adjust the brightness, contrast, and gamma settings until you achieve the desired visual experience.
Additionally, you can also experiment with different color profiles to find the one that suits your preferences.
Conclusion
In conclusion, mirroring your MacBook to your TV can be a convenient and enjoyable experience. By following the steps outlined in this article, you can easily connect your devices and adjust the display settings to ensure a seamless viewing experience.
If you encounter any issues along the way, consult the troubleshooting section for solutions. Additionally, don’t forget to explore the additional tips and tricks to enhance your mirroring experience.
So go ahead and start mirroring your MacBook to your TV for a more immersive and enjoyable multimedia experience.
